Introduction To Graphics

It is a cliche that ‘a picture is worth a thousand words’, but that is a conservative estimate. Certainly for the AmiBroker community, the ease with which images can be included in Users’ Knowledge Base (UKB) posts turns the ‘elephants graveyard’ of archival code, at the AFL library, into a garden of Eden. To take advantage of that opportunity, however, requires that authors have a basic knowledge of graphics software.

Note: The author assumes that UKB authors don’t want to learn anymore about the subject than they absolutely have to so the content of this section has been kept to a bare minimum. The bias of this article is to include the detail in the links where it becomes an optional extra.

Graphics software is software that directly manipulates images. Basic level graphics programs allow users to crop, markup and change the format of images as a minimum. Obviously advanced programs are capable of a lot more but for the UKB site professional level publishing is not a requirement.

One of the main difference between programs is the method of screen capture that is used. Basic level graphics programs generally rely on the screen capture ‘ tools’ that are inbuilt to operating systems, while advanced programs expand the screen capture capabilities.

For additional information on screen capture refer to: Wikipedia >> Screen Capture or About >> Screenshots, Tips, Software Reviews and Links to Software

The main features, of interest to authors, that are available in more advanced programs but not available at the basic level are:

  • 1) Copying a region of the screen.
  • 2) Copying a freeform section of the screen.
  • 3) Copying selected menu bars or objects.
  • 4) Including the cursor in screen-shots.
  • 5) Adding custom borders to captured images.
  • 6) User selected outputs (clipboard, editor, file, Word document, email etc).
  • 7) Image resizing (especially advanced resizing that maintains image quality).

Graphics is a career in itself but for the novice UKB author there are only three essential questions to be answered:

What software should I use?

It is a question of personal choice. The author has used MicroSoft Paint, in combination with Windows Live Writer, and produced reasonable images. By comparison to commercial software that duo can do everything required for UKB posting with the exception of adding custom borders.

A tutorial on using MicroSoft Paint has been included in this section as a starting point and to introduce graphic novices to the scope of issues they will encounter on their first attempts to ‘post with pictures’.

Refer to the Resources Links on this page for additional leads to software, software reviews and background information.

Which image format is the best?

Unfortunately, even the experts don’t seem to be able to agree entirely and discussion on the topic soon heads into the ‘tech-talk stratosphere’ . The author takes the easy way out by deferring to the experts via the links in the reference section below.

As a rule of thumb GIF, PNG and JPEG are internet compliant and the pick of the current crop. JPEG files are smaller but they are subject to degradation with repeated saves. PNG is the recommended format for a master image that is likely to be subjected to this type of treatment.

Size is an issue, albeit a minor one with regard to the UKB (keep in mind that upload time for authors and download time for readers will increase with file size).

A full-screen image (1280 X 1024 pixels) of the authors desktop, saved locally, had the following file sizes:

.BMP – 3.8 MB

.TIF – 1.5 MB

.PNG – 0.9 MB

.GIF – 0.3 MB

.JPG – 0.1 MB

The  .PNG version was reduced from 0.9 MB to 0.7 MB when it was ‘shrunk’ to 896 x 716 pixels. 

Why are some of the images in my posts grainy?

There are two common reasons why images inserted into UKB posts lose quality.

Depending on the format used, images tend to degrade as they are continually saved. As a rule of thumb minimize the number of times images are manhandled and use a file format that is suitable for that task.

The second and most important reason is that screen captured images are bitmaps and if they are resized they can  lose quality very quickly. The extent of image degradation depends on the skill of the editor and the software used. With basic software it is a certainty that significant loses will occur when images are ‘shrunk’.

This presents a challenge to authors as the UKB site has a sidebar at the top of the page which reduces the available screen width for the opening section of the post. As well as that, some RSS Feed Readers, like Internet Explorer, have a permanent sidebar, so full size images used in posts will be cut off by the sidebar no matter where they appear in the post. The only way to avoid this is too reduce the size of images and that brings a ‘catch 22’ situation into play for authors. Also keep in mind that images will display in a different way on different machines and that a full-screen image on one computer might have to be scrolled to be viewed on another machine so generally speaking ‘smaller is better’.

In the UKB article Capturing Images Using Microsoft Paint some ‘rough and ready’ ways of producing quality scaled down images are demonstrated, however they all require compromising the integrity of the full-screen shot. Sometimes, due to the detail involved, it is necessary to use a large image anyway. In those cases it is better to use the image further down the page to avoid conflict with the opening sidebar.

The only ‘professional’ way to downsize images is to use a ‘good’ editing program with advanced resizing algorithms but that is a specialist topic (a few relevant links have been included in the reference section for those readers who possess an unquenchable curiosity).

Another less common contributor to image degradation can be the failure to lock the image ratio before resizing. Always lock the width to height ratio to the original before changing the size.

Compressing images can also affect their quality. Avoid compression wherever possible and use a format that has loss-less compression (PNG or GIF).

RESOURCE LINKS

Reference:

1) Link to a tutorial on Vista’s Snipping Tool: About >> Snipping Tool

2) Link to an introductory article comparing Bitmap to Vector graphics: About >> Two Types Of Graphics Software

3) Link to an article on Bitmap resizing and image quality:  About >> Bitmap Image Editing and Software

4) Link to an article comparing image formats and discussing loss of quality when saving images: GIF, JPEG or PNG For Web Images?

5) Link to a commercial site with a demo of bicubic resampling: Photoshop Support >> Bicubic Sharper

6) Link to an article on re-sampling techniques (interpolation): Image interpolation

Software:

1) Link to a commercial screen capture program: Techsmith Corporation >> SnagIt

2) Link to a free image editing program by French developer Antonio Da Cruz : Photofiltre

3) Link to a free image editing program by Bosnian developer Irfan Skiljan: IrfanView

4) Free virtual pixel ruler: Pixel Ruler

5) Link to a suite of freeware/low cost image management programs: FastStone >> PhotoResizer, Capture, ImageViewer

Capturing Images Using Microsoft Paint (v3)

DRAFT

OBJECTIVE

 The objective of this tutorial is to demonstrate how to use Microsoft Paint to capture screen images suitable for insertion into Users’ Knowledge Base (UKB) posts.

INTRODUCTION

Paint is a simple drawing and image editing tool that is generic to all versions of Microsoft Windows. It can be used to capture, and edit, screen images for use in UKB posts. The program can be opened from the operating system Start > All Programs > Accessories path. The program is limited in features but ‘professional’ level publishing skills are not essential for publishing to the UKB. Content is considered more important than the format! It is recommended for occasional authors, especially if a post only contains a few images, or for those who prefer not to have to buy screen capture software.

For additional information on Paint refer to: Paint (Software) from Wikipedia

Paint supports BMP, GIF, TIFF and PNG file-types. For a comparison of the suitability of each type, for web  publishing, refer to: GIFF, JPEG or PNG

SPECIFICATIONS

This tutorial was written using Microsoft XPHome, Word 2002 and Paint V5.1.

CAPTURING IMAGES

Preparation

When Paint is opened the canvas (the white square in the Editing Window) will be the size of the last image that was used before the program was closed. The canvas needs to be smaller than the image pasted into the Editing Window or the image, when saved, will include the excess white space. As a time saver the default canvas size can be reset before each session.

Note: a small canvas will auto-size to a larger image but not vice-versa.

To set the canvas size:

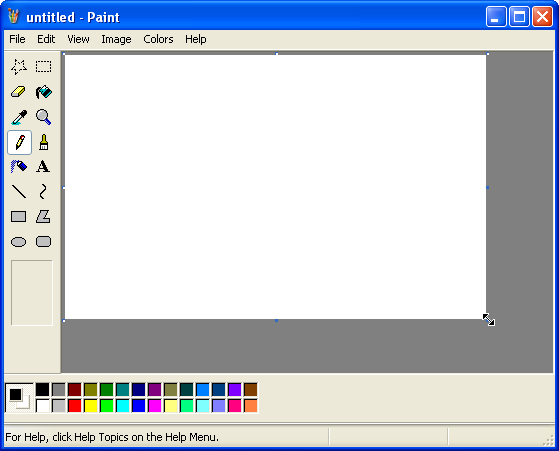
1) Open Paint and hover the mouse pointer over the bottom right corner of the canvas until a moving pointer appears.

Figure 1
PIC003

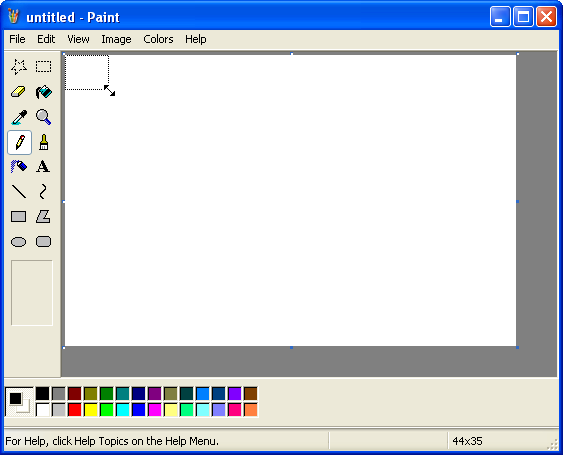
2) Hold down the left mouse button and drag the moving pointer to resize the canvas to a very small area.

Figure 2
PIC004

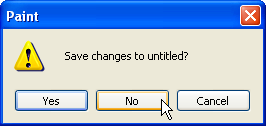
3) Close paint and click on No when asked to Save changes to untitled?

Figure 3
PIC006

4) Open Paint again and the canvas will now be small (this will also be the default size for new canvasses for the session).

Sizing screen-shots:

Once an image is captured it will lose clarity if it is resized. Since the images are going to be inserted into a standard web-page, minus the width of the sidebar, (the width at the top of a UKB page is approximately equivalent to a letter size document in a word processor) it is better to keep them to less than around 6 inches, or 600 pixels (authors will need to experiment with this as pixelation varies from machine to machine). This rules out any chance of using clear full-size screen-shots in a standard post. One way to get around this is to alter the story line to avoid having to use full screen-shots. Another is to minimize and/or resize the window when taking large screen shots.

Note: this alters the proportion of the contents of the window so using this method is always a compromise between clarity and a faithful reproduction of what the user will see on their screen when they follow the instructions.

At other times, there is just no way around it and the show must go on, ‘grainy’ image or not. However, since the details contained in an image are often critical to UKB posts, full screen shots can be attached without resizing, provided they are not included in the first page (images that are larger than the available space will run off the page and overwrite the UKB sidebar if they are inserted at the top of the post). This makes for very large images, which will not view correctly in all web modes, but readers can easily find ways to view the full image and see the detail.

Note: As a UKB ‘page’ is scrolled downwards, the sidebar moves off the screen and the width available for publishing increases, so larger images can be inserted into a post after the first page.  This is not the case for all web views e.g. when reading RSS feeds in I.E. v7 the sidebar is a permanent fixture, and it does not scroll off the page, which makes for a different page width in the reader compared to the ‘online’ view (in this case, images are trimmed, from the right, to fit into the available space.

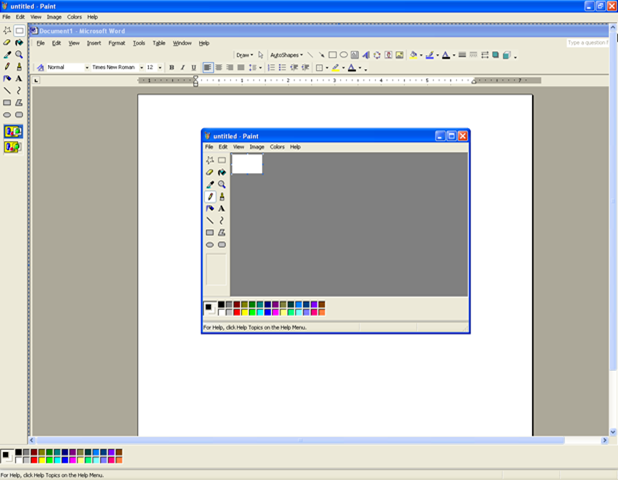
A handy trick for sizing the images before capture is to open them in a second window, over the top of a Word document in Print Layout, and use the ruler in Word to align the image to the width of the document ( as a rule of thumb the image needs to be able to fit into a Word page without resizing).

To estimate image size:

  • 1) Open a Word document in Print Layout.
  • 2) Open Paint (it will open on top of the Word document).
  • 3) Minimize Paint and use the mouse to drag the borders of the Paint window to the required size (as far as possible try to keep the width to height ratio constant).
  • 4) Position the mouse pointer in the Title bar and click and hold the left button to drag the Paint window and align it over the center of the Word doc to ‘measure’ the size of the image.

 Figure 4
PIC014

Note: This image is ‘grainy’ because it has been resized from 1280 x 944 pixels to 618 x 480 pixels to fit onto the ‘page’.

5) When the image has been correctly sized, press and hold down Alt then press the PrintScreen key on the keyboard (a copy of the current, or topmost, window will be placed on the Clipboard).

Note: a screen-shot can be taken by pressing PrintScreen alone.

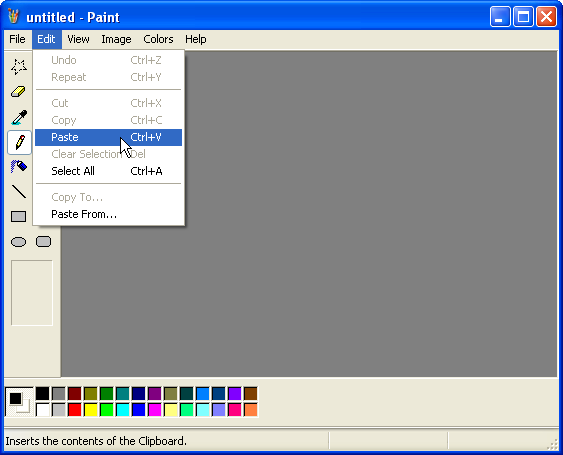
The captured image can be pasted into Paint by selecting Edit > Paste from the menu bar and then saved to the local disc for later use.

Figure 5
PIC007

 Note: The captured image can also be pasted from the Clipboard straight into Word, or an editor (depending on the program used) if image editing is not required, or a backup is not going to be kept.

As work progresses, the underlying Word view, and the window to be captured, can be toggled back to the ‘top’ by clicking on the Word icon in the desktop Taskbar, followed by the program icon.

Figure 6

PIC000 

EDITING IMAGES

Paint can be used for basic image editing.

Using the select tool

Any section of a screen-shot can be cut from the image, using the Select tool. As an example, the Paint window, in Figure 4  above, will be isolated from the screen-shot and saved for insertion into a post.

To copy and save a window contained in an image:

Note: This is a nominal exercise to demonstrate some core procedures. In practice, a window can be copied  by using Alt > PrtScn.

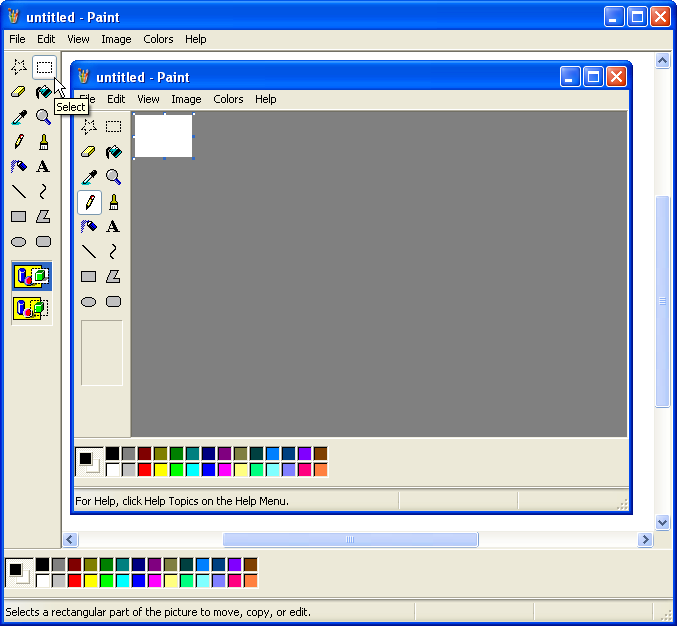
  • 1) Use the scroll arrows to position the required part of the image in the middle of the Editing Window.
  • 2) Pick the Select tool from the Toolbox.

Figure 7
PIC008

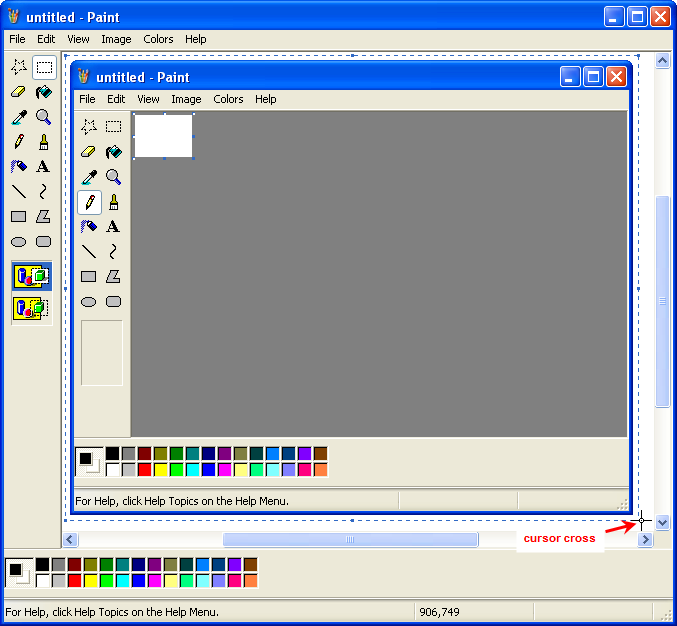
 2) Position the select tool cursor cross over the top left hand corner of the required area and drag the cursor to surround it with the ‘cut-out’ marker.

Figure 8
PIC024

Note: It is difficult to position the ‘cut-out’ markers precisely over the image, and copy it, without some over-cut on the edges. A good trick is to drag the window over top of a blank Word document before taking the screen-shot, as the background to the ‘cut-out’ will be white. If the background is white, there is no need to be precise with the ‘cut-out’ shape as the white over-cut will blend into the post background.

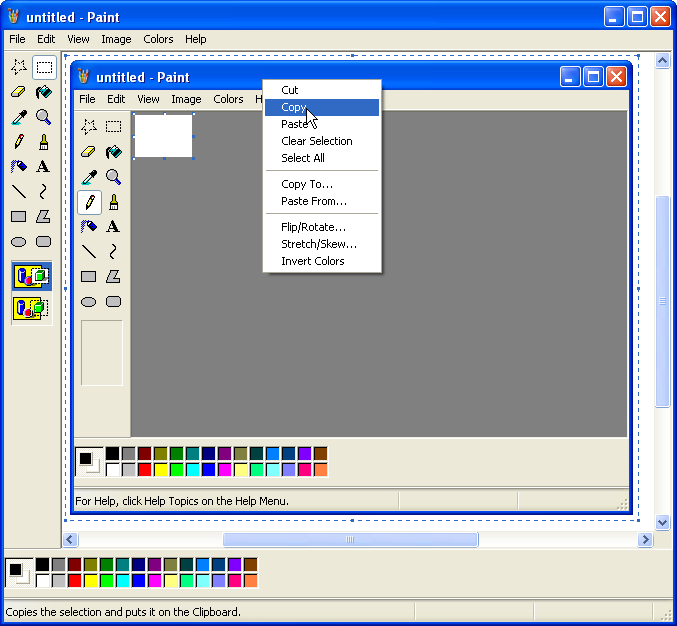
 3) Right click inside the marked area and select Copy from the context menu that  opens.

Figure 9
PIC010

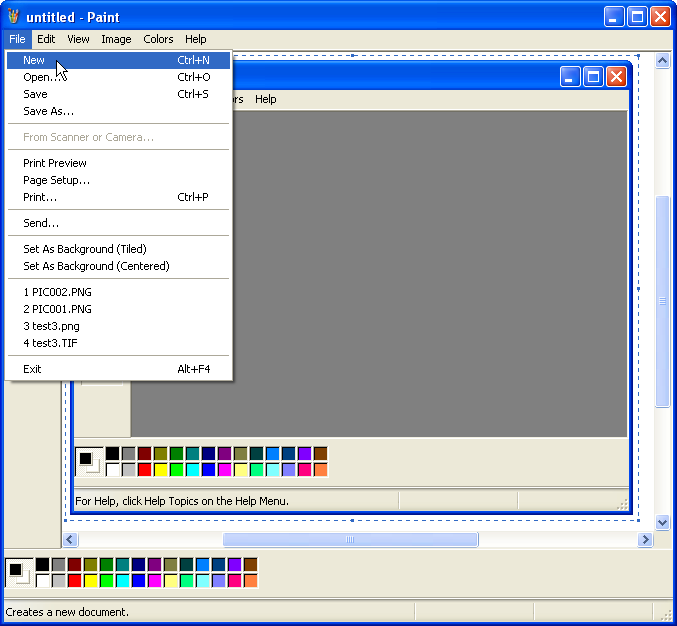
4) Select File > New from the menu-bar to open a new canvas.

Figure 10
PIC011

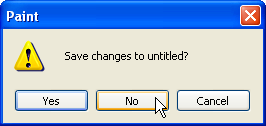
5) Click on No when asked to Save changes to untitled? ( a new Editing Window will open).

Figure 11
PIC012

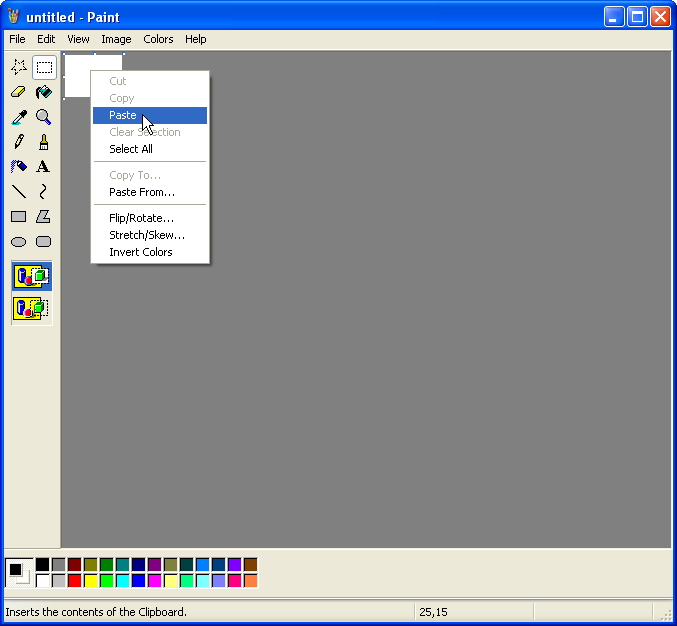
6) Right click inside the blank canvas and pick Paste from the context menu (the copy of the cut-out area will be pasted onto the blank canvas). 

Figure 12
PIC013

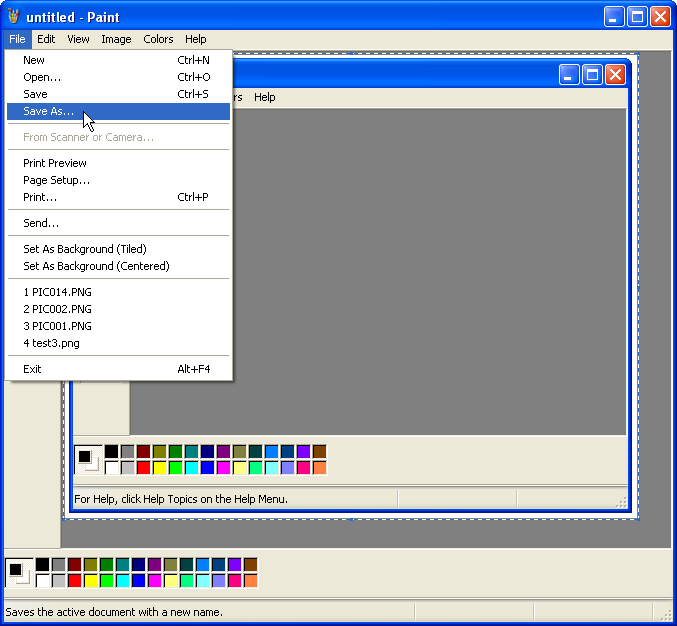
7) Go to Save As from the File menu to save the copied image (the Save As browser window will open).

Figure 13
PIC015

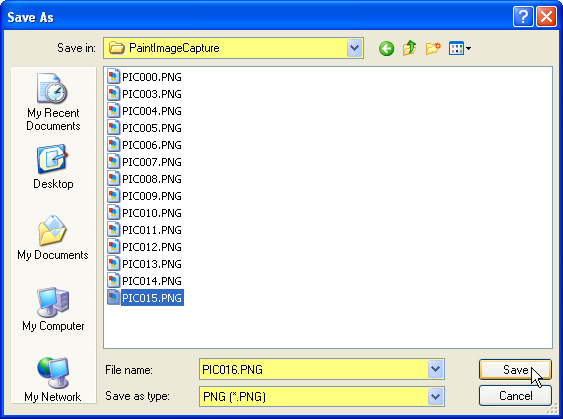
8) Select the folder to Save in and the Save as type, enter a title into File name and click on Save.

Figure 15
PIC025

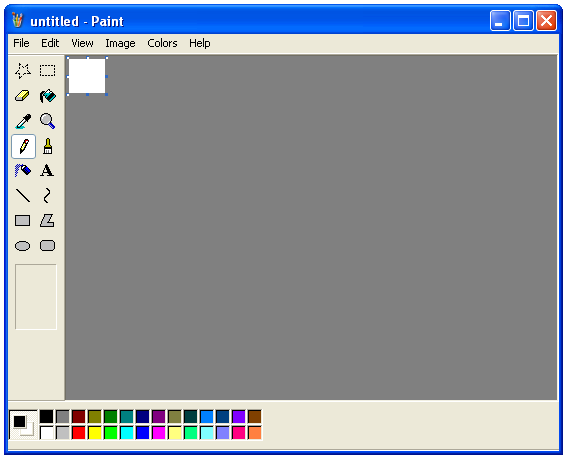
After the image has been saved it can be inserted into a post e.g. the image below is the window that was ‘cut-out’ and saved as a copy in the example above. Notice that when an image, with white over-cut edges, is inserted into a post the white cant be seen.

Figure 16
PIC016

Note: Once again, if the image is not going to be backed up the copy of the cut-out can be pasted into an editor and Paint, or the current window, can be closed without saving.

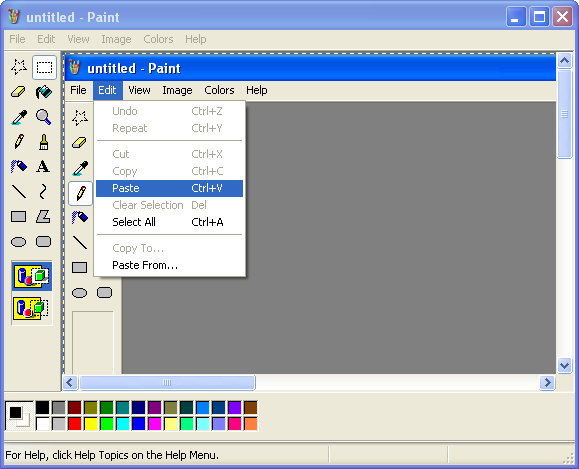
The Select tool can also be used to ‘clip’ any part of a window e.g. toolbars, menus etc. This is a more difficult exercise, than copying a complete window, since in most cases the objects in question will be surrounded by a variety of shapes and colors so the captured images need to be trimmed with precision.

To copy a specific section of a window:

1) Capture a full-size screen-shot and paste it into Paint (if the required area of the screen is less than 6 inches sizing is not an issue).

Figure 17
PIC026

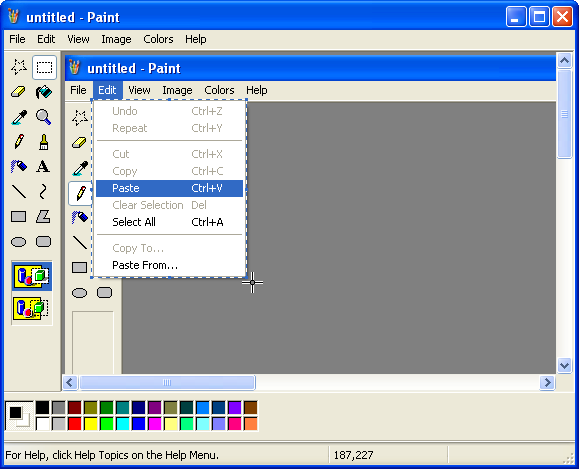
2) Use the Select tool to position the cut-out marker as close as possible to the edge of the required section.

Note: If the background color of the cut-out is white it will not view well online, where the background is also white, without a border. There are two ways to work around this. Either err on the side of over-cutting to ensure that the borders, if any, are captured, or under-cut the image and add borders to it in Word. If the background color of the cut-out is not white, err on the side of undercutting as borders are not essential for colored images.

Figure 18
PIC027

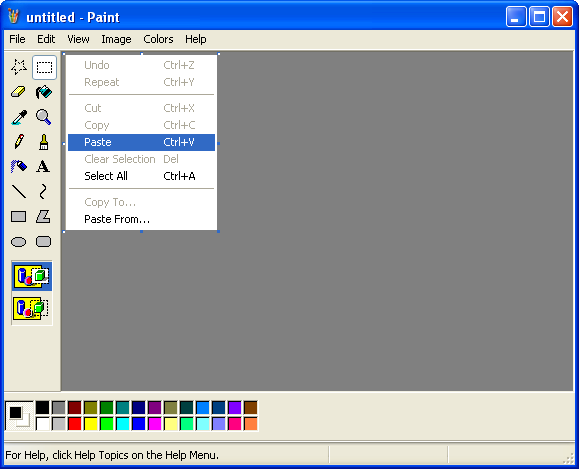
3) Copy and paste the cut-out onto a new canvas and save it to disc or, alternatively, paste it into an editor.

Figure 19
PIC028

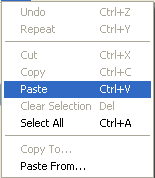
Clipping screen-shots, using Paint, doesn’t produce images with the precision of specialist screen capture software but the quality is still reasonable.

Figure 20
PIC028

Some minor editing glitches, like the over-cut borders in Figure 20, can be worked around using a combination of Word and Paint.

Cropping images in Word

Images, cut from Paint, can be trimmed in Word.

To crop the edges of an image:

  • 1) After pasting the cut-out into Paint, paste a second copy into Word.
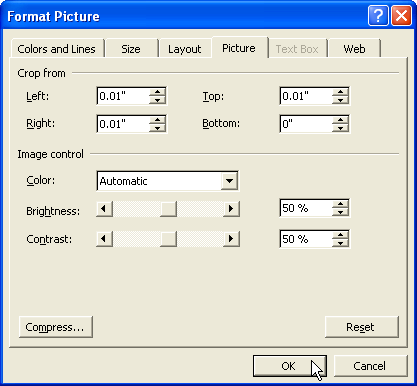
  • 2) Right click on the image, in Word, and use the context menu to pick Format Picture (the Format Picture window will open).
  • 3) Click on the Picture tab and use the scroll arrows, or type into the input boxes, to set the Crop measurements. Then click on OK.

Note: the default when scrolling is 0.01 inches. Finer cropping can be achieved by typing into the input boxes and using two decimal places (the settings shown in Figure 21 were used, in this example, to clean-up Figure 20).

Figure 21
PIC030

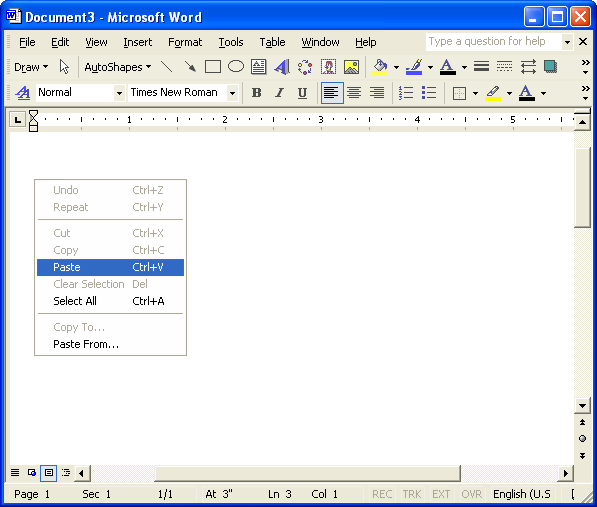
The nominated amount will be cropped off each side of the image.

Figure 22
PIC032

Note: Trial and error is sometimes needed to achieve the desired result. If necessary use Edit > Undo from the menu-bar to restore the image and repeat the exercise using different settings.

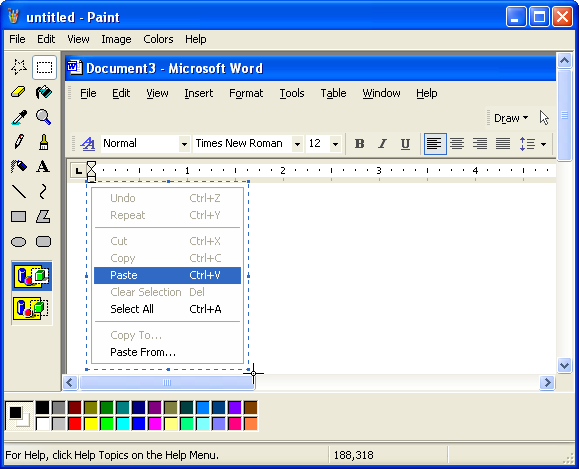
4) When a satisfactory outcome has been achieved, capture a screen-shot of the Word doc that contains the edited image and paste it into Paint for editing.

Note: The original version, held in Paint until a successful edit has been completed,  can be dumped at this stage.

Figure 23
PIC033

Note: the image can be over-cut because it now has a white background.

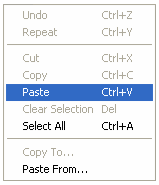
Although there is some loss of quality, due to the number of times the image has been copied between mediums, it still does the job.

Figure 24
PIC034 

Adding borders to images in Word

Borders can also be added to images that are edited in Word

To add borders to an image:

  • 1) After pasting the cut-out into Paint, paste a second copy into Word.
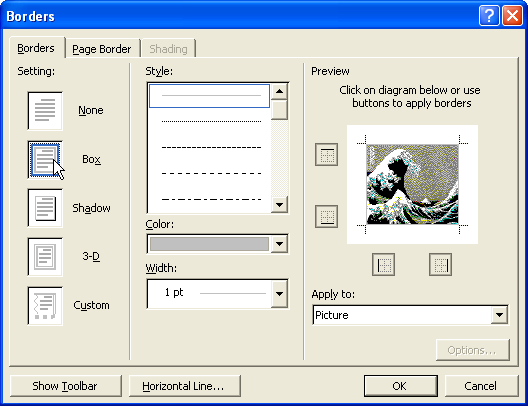
  • 2) Click on the image to select it then use Format > Borders and Shading, from the menu bar, to open the Borders window (Borders and Shading is also accessible from a right click context menu).
  • 3) Click on the Borders tab.
  • 4) Set the line Style, Color and Width, then click on Box to apply the settings to all sides of the image (they can also be applied individually using the icons in the Preview pane, or by clicking on the Preview image side by side).
  • 5) Click on OK (the selected borders will be inserted around the image).

Figure 25
PIC031

6) Use Paint to capture, cut-out and save the image.

EXAMPLE

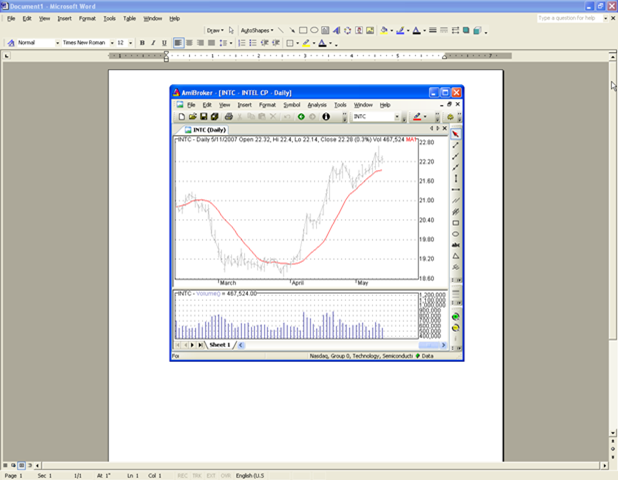
Figures 26 – 28 are examples of capturing an AmiBroker chart image by:

1) Sizing the program over Word.

Note: in this example the window was over-sized relative to the Word page because it is the chart that the window contains that is of interest.

  • 2) Pasting a screen-shot into Paint.
  • 3) Cutting and pasting a segment of the screen-shot into Word.
  • 4) Adding borders in Word.
  • 5) Pasting a screen-shot of Word, containing the edited image, back into Paint.
  • 6) Cutting and saving the image in Paint for insertion into this post.

Figure 26
PIC018

Figure 27

PIC035

Figure 28

PIC036  

The final image isn’t too bad at all!

 Additional editing features

Text and arrows etc can be added to images to clarify and highlight features.

To add a text box to a figure:

1) Click on the Text icon in the Toolbox.

Figure 29

image

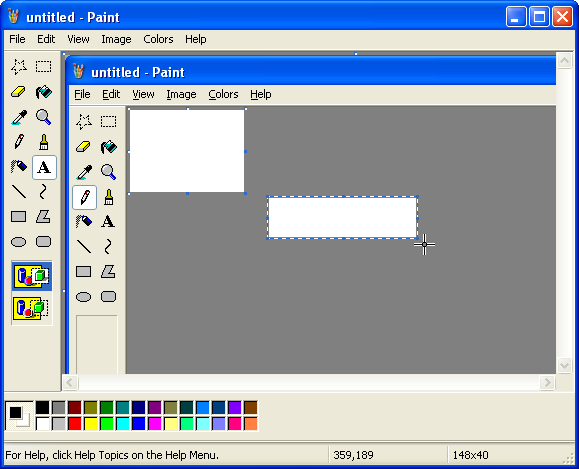
2) Position the cursor cross in the image, where the text is going to be inserted, and hold down the left mouse button while dragging it to form a box of the required shape and size.

Figure 30
clip_image001

3) Type text into the box.

Figure 31

image

4) Right click inside the text box and pick Text Toolbar from the context menu that opens.

Figure 32

image

5) Text in the box can be formatted using the floating toolbar that opens.

Figure 33

image

Additional editing tools e.g. eraser, pencil, paintbrush etc can be used in a similar way.

Figure 34

image

For additional information on image editing refer to the Paint help manual.

Capturing menu bar dropdowns

Some examples need the menu bar dropdown to be visible in the window. If Alt + PctSrn is used the dropdown will close as soon as Alt is pushed. One way around this is to position the mouse pointer over the menu (or a command in the menu) and hold the left mouse button down while pushing Alt + PrtScn at the same time (Figure 35 was ‘taken’ use this method).

Figure 35

image

VISTA VERSION 

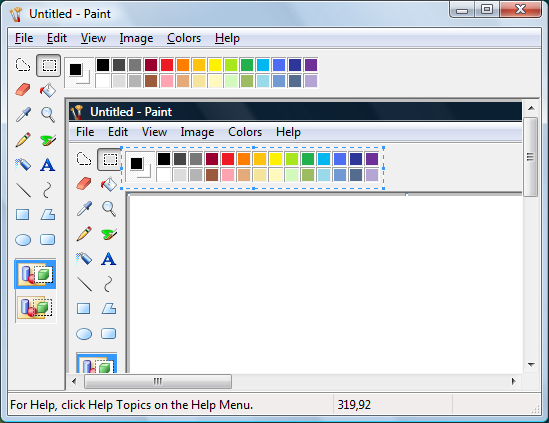
A new version of Paint, V6, has been included with the release of Vista, Microsoft’s new operating system. The features in V6 are almost identical to the previous version, except for the addition of image cropping.

To crop images in Vista’s Paint:

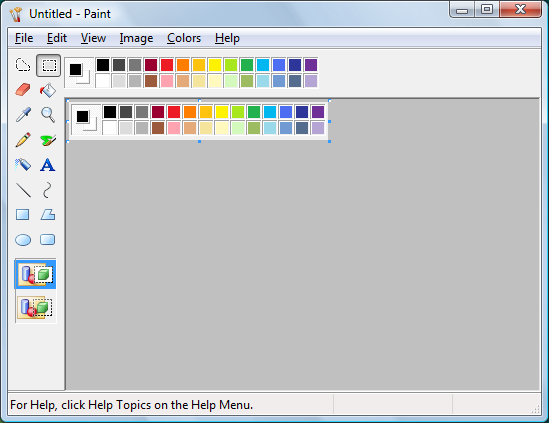
1) Use the Select tool to mark the cut-out area.

Figure 31
PIC100

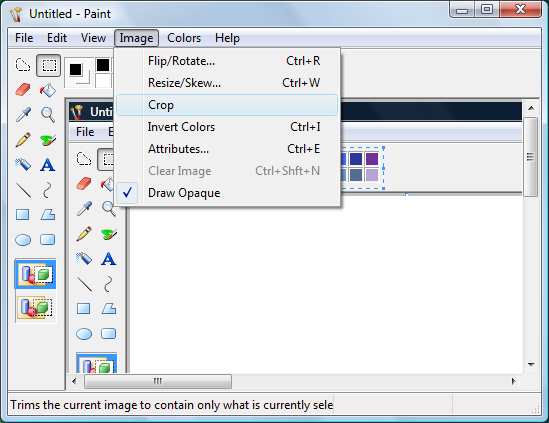
2) Select Crop from the Image menu box.
PIC101

The area outside the marked section will be cropped from the picture.
PIC102

3) Save the image to the local disc for future use or copy paste in straight into an editor.

PIC103

Note: The crop feature can not trim the edges of images. Images with colored over-cut on the edges will still need to be pasted into Word for trimming.

To copy an image from Paint for pasting to Word, or an editor:

  • 1) Open the image in Paint using the File > Open command on the menu bar.
  • 2) Pick Select All from the Edit menu and then select Copy from the same menu (the Copy command in the Edit menu list will turn from gray to black when the image is selected).
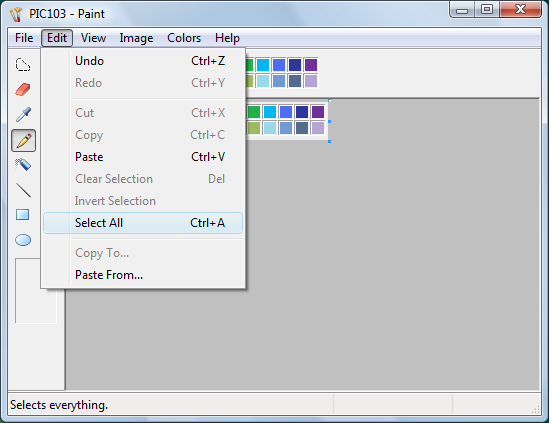
PIC104

A copy of the image will be placed on the clipboard for pasting into another program in the normal way.

  • version 1 – Aug9/2007 – by brian_z – written using Windows Live Writer beta 2 – SnagIt and Paint used for screen captures – all images saved in PNG format
  • version 2 – Aug16/2007 – by brian_z – minor corrections – added a section on additional editing features
  • version 3 – Aug17/2007 – by brian_z – added comments to Sizing Screenshots

Ordering Posts

TO BE COMPLETED AT A FUTURE DATE.

In the short term here’s the patch!

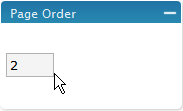
The published date, for a post, is listed in several places. It is used for everything by default – searches, post order, RSS feedstream etc. AmiBroker customized a Page Order property to allow Table Of Contents sorting. It is mainly used where an Author is writing a ‘series’ of posts on a specialist topic e.g. I/O, Automated Trading. The Author is ‘assigned’ ownership of the category so they can present their posts so that visitors read them ‘like a book’.

Page Order can be set from the WordPress Admin Center. Go to Manage and open the relevant post(s). Change the Page Order setting from the default (zero) to any whole integer between – 2,147,483,648 and + 2,147,483,648  to position the post in order, relevant to other posts in the category or sub-category (1,2,3,4,5, etc is as good as anything since it aligns to the default bulleted numbers assigned to the TOC view).

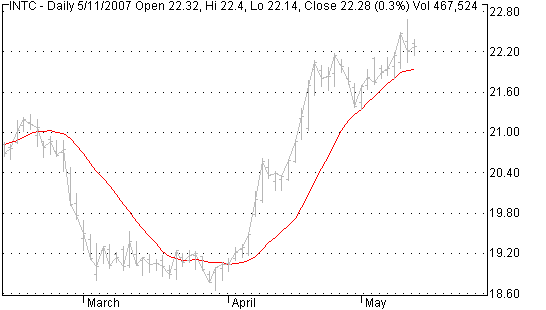
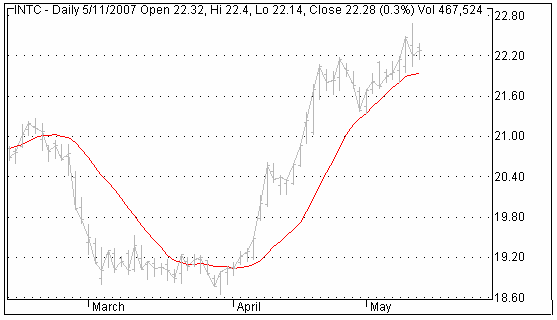
1) Change the sort number in the Page Order properties box.

clip_image001

Note: This is the Page Order setting for Contributors >> UKB Post Formats, which makes it the second post in the Contributors category.
2) Save the post to lock in the changes


Note: There’s no need to worry about editor conflict. Any post property can be reset without conflict, irrespective of what editor was used to publish the post (posts that are written in WLW can have the Page Order reset from the WP Admin Center without problems)

 Posts can also be reordered by ‘manually’ changing the published date but!!!!!!

note: changing publish date will change the folder that the post is stored in – if it moves the post to a new month ??? – server folders are on a (monthly) date basis -(will affect links to it that exist in other posts)

need to address the issue of reporting broken links.

UKB Post Formats (v2)

Quick Posting

DRAFT

OBJECTIVE.

This is the first in a series of introductory articles intended to help new contributors become familiar with using WordPress for publishing to the Users’ Knowledge Base (UKB). It will demonstrate the quickest method to post, with a minimum of fuss, for busy people who ‘are on the go’ and don’t want to have to spend too much time ‘learning’ the software. It is also recommended for occasional Authors. Later articles in the series will provide more detail on basic WordPress procedures for ‘involved’ contributors.

 THE ADMIN CENTER

Login To The Admin Center

To be able to write and publish in WordPress approved Authors need to login to the WordPress Administrative Center via the UKB homepage.

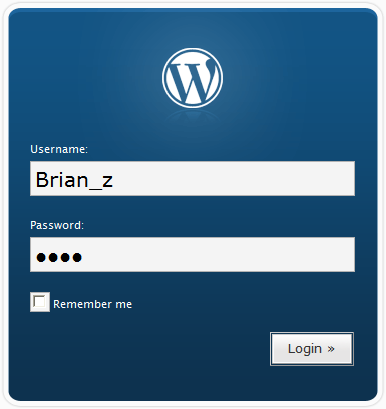
To login to the WordPress Administrative Center:

  • 1) Obtain a Username and Password from support [at] amibroker.com
  • 2) Click on Login, in the right hand sidebar of the UKB homepage, and enter your Username and Password into the Login Window,
  • 3) Then click the Login button.
  • Login Window
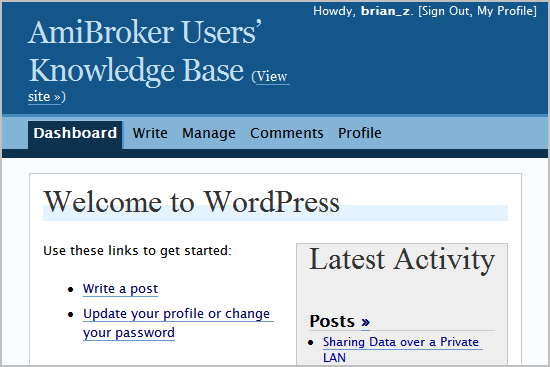
  • A successful Login will open the WordPress Administration Center with the Dashboard as the default view.
  • For Authors there are four other panels, besides the Dashboard, available: Write, Manage, Comments and Profile .
  • WP002 

Initial Setup

On the first visit to the Administration Center there are some preliminary tasks to perform.

To complete the initial setup:

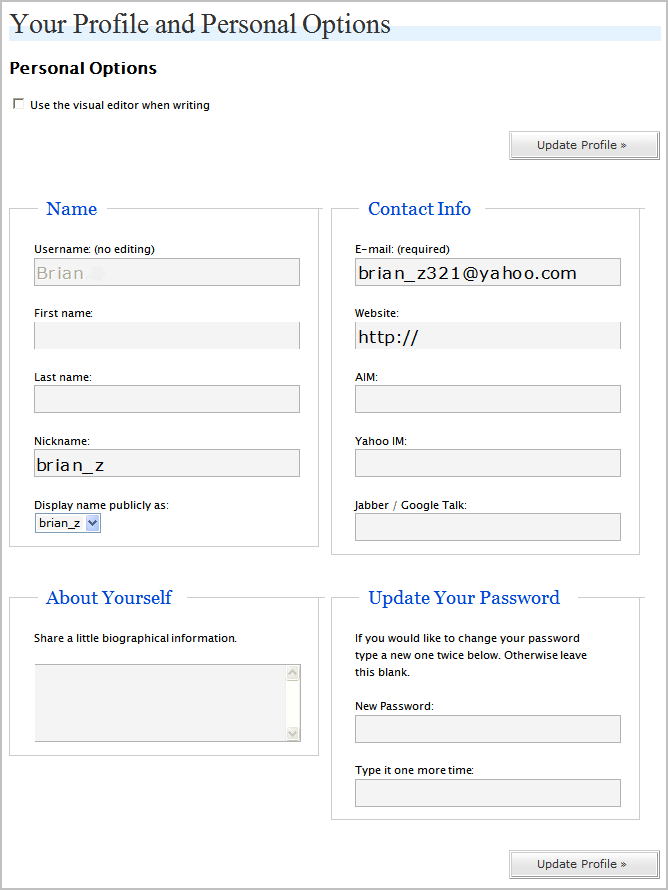
  • 1) Click on Profile (the Profile Subpanel will open).
  • QuickPost021 
  • 2) Uncheck Use the visual editor when writing.
  • 3) Change the password settings or any personal details as required.
  • 4) Click on the Update Profile button.

A confirmation message box will appear to acknowledge that the Profile has been updated.

QuickPost014 

Users can now proceed with writing the post.

 WRITING POSTS

QuickPost Formatting

The recommended format for QuickPosts is to write a short summary, to lead the article, and attach a file containing the body of the post. The summary will comprise the post, as it appears in the Weblog, and should provide enough information to allow readers to decide if they want to open the attachment and read the contents. The summary will be inline when the UKB site is searched internally, or, when it is presented to external search engines e.g. Google. For this reason the summary should also include a list of keywords that communicate to readers, and search engines, the subject areas that the post covers.

The attachment should be written in Portable Document Format (PDF), as the first choice, to allow as many readers as possible access to the files. Alternatively a Microsoft word processing program can be used.

For additional information on QuickPost attachments refer to: UKB >> PDF Attachment or UKB >> Word Attachment 

Writing A Post Summary

After updating Your Profile and Personal Options click on Write to open the Write Panel, with the Code Editor as the default.

The Editing Window, which occupies the major portion of the screen space, functions like a simple word processor. The body of the post can be written directly into the Code Editor using plain text.

 To write the ‘body’ of a QuickPost:

1) Start by entering the Title (avoid using the same Title twice as that can cause problems).

Note: The Title can contain any words or phrases. Commas, apostrophes, quotes, hyphens, dashes, and other typical symbols can be used. (WordPress will retain symbols in post titles but remove them from links used within the program).

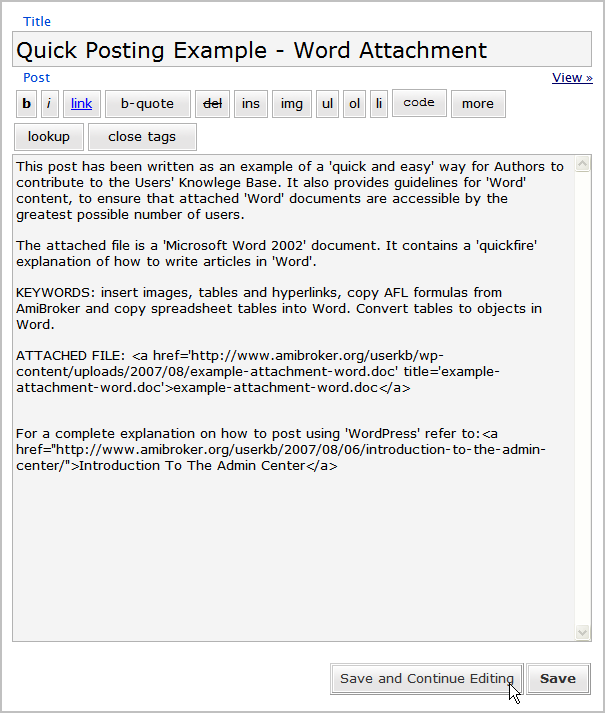
  • 2) Type a summary of the contents of the attachment(s) into the Editing Window.
  • 3) Add a list of the Keywords that best categorize the contents of the attachment.

Note: The UKB default format does not accept highlighting however the keywords can be highlighted using capital letters and/or colored fonts.

4) Click on Save and Continue Editing.

 QuickPost036

 ATTACHING FILES

After the body of the post has been completed file(s) can be attached.

To attach files to a post:

  • 1) Save the file to be attached, with a meaningful and unique name, on the local computer.
  • 2) Scroll down the to Upload Sub-panel at the bottom of the Write panel and click on Browse.

QuickPost004 

  • 3) Use the Browse window that opens to find the file required on the local computer.
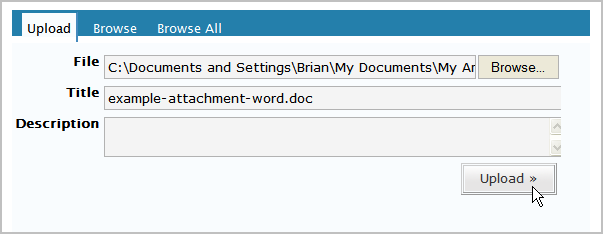
  • 4) Click on Upload (the local file will be uploaded to the UKB server and the file name will automatically be entered in the Title input box).

QuickPost039 

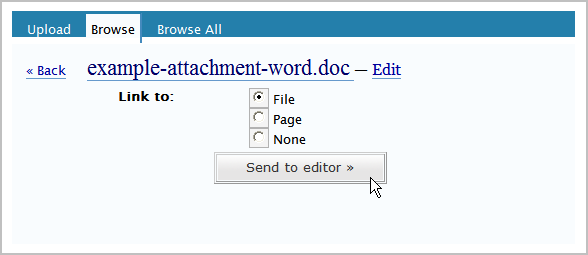
5) Position the cursor in the Editing Window, where the file is to be located, and click on Send to editor (a link to the file will be inserted, using the Title as the link text).

QuickPost037 

6) Click on Save and Continue Editing.

PUBLISHING POSTS

Before publishing the post, it needs to be assigned to a category.

To assign a post to a category:

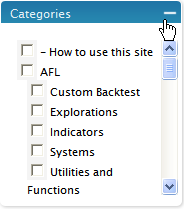
1) Expand the Categories box by clicking on the cross in the top right hand corner (the categories box is in the top of the right hand side bar in the Write Panel).

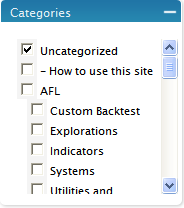
QuickPost040

2) Uncheck Uncategorized and check the required category, by clicking on the checkbox (Uncategorized is the default for all saved posts that are unassigned).

WP011

 Once a post has been assigned to a category it can be published by clicking on the Save button at the bottom of the Editing Window.

The post used as the example in this tutorial can be viewed at: UKB >> Quick Posting Example – Word Attachment

Deleting Published Posts

When a post is deleted any files that were in the local library will remain on the server in the common library. It is recommended to delete library files from the server before deleting a post, unless the author has a future use for them.

Uploaded files can be deleted from the Browse Sub-panel , but only by the owner.

To delete uploaded images:

  • 1) Go to the Upload > Browse Sub-panel,
  • 2) Click on the file icon,
  • 3) Click on the Edit link that is appended to the file name in the Insert sub-panel,
  • 4) Click on the Delete File button at the bottom of the Browse sub-panel.

 QuickPost041

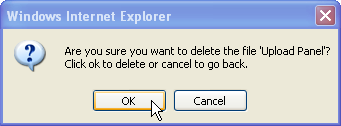
 Note: When the mouse pointer is hovered over the button it turns red to warn the user of the consequences of clicking on the button and a confirmation message box will open with a warning.

WP031

 CONCLUSION

That ends this tutorial on a shortcut method of posting to the UKB.  It does not take users to full competence on WordPress or deal with the exceptions that can be encountered when using the ‘program’.

For a more complete explanation of WordPress publishing procedures refer to: UKB >> Introduction To The Admin Center

check – replace files by delete and upload – only if in same month?

add link to viewing attachments

Quick Posting Example – PDF Attachment

TO BE COMPLETED AT A LATER DATE

Code editor special characters demo

I have been asked if it is possible to enter < > = characters in the code editor.
Of course it is possible. See this example:


variable = Close <= 100;

See the other, longer code:


function MarketFacilitationIndex()
{
return ( High – Low )/Volume;
}

mfac = MarketFacilitationIndex();
rm = ROC( mfac, 1 );
rv = ROC( Volume, 1 );

Color = IIf( rm > 0 AND rv > 0, colorGreen,
IIf( rm < 0 AND rv < 0, colorBlue, IIf( rm > 0 AND rv < 0, colorGrey40, IIf( rm < 0 AND rv > 0, colorRed, colorLightGrey ) ) ) );

Plot( mfac, _DEFAULT_NAME(), Color, ParamStyle(“Style”, styleHistogram | styleThick, maskHistogram ) );

Quick Posting Example – Word Attachment

This post has been written as an example of a ‘quick and easy’ way for Authors to contribute to the Users’ Knowlege Base. It also provides guidelines for ‘Word’ content, to ensure that attached ‘Word’ documents are accessible by the greatest possible number of users.

The attached file is a ‘Microsoft Word 2002’ document. It contains a ‘quickfire’ explanation of how to write articles in ‘Word’.

KEYWORDS: insert images, tables and hyperlinks, add captions, copy AFL formulas from AmiBroker and copy spreadsheet ‘tables’ into Word. Convert tables to objects in Word.

ATTACHED FILE: example-attachment-word.doc

For a complete explanation on how to post using ‘WordPress’ refer to:Introduction To The Admin Center

Introduction To Editing (v2)


This is the first in a series of introductory articles intended to help new contributors become familiar with the Users’ Knowledge Base (UKB) publishing procedures, so that they can quickly move to productive endeavors.

Posts intended for the main body of the UKB need to be written in Hypertext Markup Language (HTML), although contributions can also be made in other ways e.g. by attaching a word processing document to a post.

WordPress, the software behind the UKB, contains a built-in, albeit limited, editor that allows authors to enter their posts ‘online’. This provides, arguably, the quickest and simplest way to write and publish articles. Advanced programmers will have no trouble understanding, using, and extending the capabilities of the WordPress editor. On the other hand, those who are new to programming can quickly learn how to enter basic posts, via WordPress, using the examples provided in this ‘series’.

Note: It is possible to ‘publish’ without the need to learn HTML or other programming languages.

Third party editors can also be used. Authors with an IT, or programming background, will be familiar with third party editors. Authors, with the experience, can use their favorite editing programs to publish to the UKB by pasting code from them into the WordPress editor. At the other end of the scale, most people would be familiar with Notepad, or programs like it, that can be classed as simple third party or text editors. Posts can be written ‘offline’, using text editors, and copy/pasted into the WordPress editor at a later date.

The advantage of third party editors, in general, is that they offer a range of features that make code writing easier and faster for programmers e.g. syntax highlighting, auto-correction or completion of commonly used terms, find and replace ‘text’ etc. Other editors provide authors with a visual writing mode, that facilitates the creation of graphical and interactive web pages in a ‘What You See Is What You Get’ (WYSIWYG) environment.

The UKB is far from a fully featured web-site. It belongs to a special class of web-sites known as Web-logs or Blogs. As a rule of thumb, Blogs have a limited scope compared to a ‘web-site’. In general this reduces the need for their creators, or contributors to the Blog, to learn advanced programming skills. This maxim holds true for the UKB. In addition to that, because the UKB is a Knowledge Base, the emphasis has been placed on content rather than format. Because of the ‘restricted’ nature of the site, advanced editors, are a level above what is required to publish to the UKB.

A special class of third party editors, known as Blog Editors (Weblog Clients), provides software that is suitable for UKB authors who prefer a visual ‘writing’ medium . They are designed to synchronize with popular blogging software, in this case WordPress.

Features of Blog Editors (in general):

  1. portability
  2. save drafts offline and publish at leisure
  3. visual editing
  4. additional formatting options compared to the WordPress editor 
  5. insert and format images using graphical tools
  6. graphically insert and manage links
  7. automatic synchronization to the WordPress format
  8. automatic login to the UKB Administration Center
  9. bulk uploading of image files (automatic) 
  10. downloading of published posts
  11. HTML view, including editing capabilities
  12. offline web preview 

Depending on the software used, there are additional features that can be useful to authors:

  1. copy and paste rich text formats as plain text (suitable for publishing to the UKB)
  2. copy and paste word documents, including images, directly into the editor
  3. maintain offline backups 
  4. bulk uploading of file attachments
  5. save copies as portable HTML files (with contained images)
  6. insert and format tables
  7. insertion of custom HTML snippets
  8. spell-check
  9. automatic appending of titles to uploaded files

Unfortunately all of those features don’t come in one single software package.

Note: The author of this article has successfully posted to the UKB using BlogDesk, Post2Blog (ByteScout) and Windows Live Writer (Microsoft) as well as the WordPress Code Editor.

CAUTION – AUTHORS WHO ARE GOING TO USE BLOG EDITORS NEED TO BE AWARE OF THE FOLLOWING CAVEATS:

  1. As a rule of thumb, they are incompatible with the WordPress Visual Editor (the WordPress Visual Editor should be turned off).
  2. Code written in the WordPress Code Editor might not be compatible with Blog Editors and will not necessarily download correctly into them.
  3. Code written in some Blog Editors uses different HTML ‘formats’ to the WordPress Code Editor, especially with regard to paragraphs and line breaks (use either a Blog Editor or the WordPress Code Editor; not both).
  4. Blog Editors can produce code that is not compatible with other Blog Editors (do not mix and match Blog Editors).
  5. Some Blog Editors provide rich text formatting as an option. This is in conflict with UKB defaults and may introduce unwanted behavior to the UKB server. DO NOT use rich text formatting features.
  6. Some Blog Editors capture web-pages, or parts of a web-page, for transmission to a Blog site (DO NOT capture or copy and paste any ‘pages’ that contain, or might contain, HTML code as it may introduce unwanted behavior to the UKB server).

Note: All of the Blog Editors tested by the author of this post, have produced ‘exceptions to the rules’ that had to be managed without support (novices should limit Blog editing to the basics and heed the cautions in this post).

AGAIN:

  1. TURN OFF THE WORDPRESS VISUAL EDITOR.
  2. USE ONE BLOG EDITOR AT A TIME.
  3. USE A BLOG EDITOR 100% OF THE TIME OR USE THE WORDPRESS CODE EDITOR 100% OF THE TIME.
  4. LEAVE OUT THE FANCY STUFF (SORRY, I KNOW ITS NOT AS MUCH FUN BUT IT WILL SAVE A LOT OF HEADACHES IF WE KEEP IT SIMPLE_SALLY OR SAM).

Tutorials, covering all of the core skills required to achieve basic competency as a UKB Author, and articles on a variety of publishing topics can be found at: AmiBroker Users’ Knowledge Base >> Contributors 

For additional information and links to publishing resources refer to: Wikipedia >> HTML Editor

Please read on!

 Note: The posts contained in the Contributors category only cover ‘publishing’ basics, with a limited range of publishing software and utilities provided as examples. Like everything ‘IT’, the programs and procedures are subject to rapid redundancy. They will be maintained into the future, to the best of the ability of the volunteers who ‘help’ out at the site. Visitors to the site are invited to help correct errors, or omissions, and suggest improvements, or alternative ways of going about it, by adding comments to the posts. Where enough new information comes to light, to warrant an extension or a separate article, please become an author and post to the site or email one-off articles to support [at] amibroker.com for uploading to the UKB. Ditto for specialist topics beyond the ken of the average person, or if you are ‘hot to trot’ on a particular topic or program. This will help the authors, and the editor, in their efforts to maintain this as a dynamic site.


RESOURCE LINKS:

HTML Editors

Link to a free ‘text’ editor with HTML capabilities (‘NotePad on steroids’): Fookes software >> NoteTab Editors >> NoteTab Light

Blog Editors


  • Version 1 – Aug 04/2007 – by Brian_z – written using Windows Live Writer beta 1
  • Version 2 – Aug 13/2007 – by Brian_z – draft rewritten and links section added

Introduction To The Admin Center

Objective.

This is the first in a series of introductory articles intended to help new contributors become familiar with the Users’ Knowledge Base (UKB) publishing procedures, so that they can quickly move to productive endeavors. The first few articles will focus on WordPress and will demonstrate all of the basic skills required to enable contributors to post, using WordPress as the blogging tool. Later articles will cover third party publishers, including third party visual editors and screen capture tools.

Introduction

The UKB is built on the free weblog platform and blogging tool WordPress. Information on WordPress , including documentation, support and forums can be obtained from:

http://wordpress.org/

The UKB site is hosted and administered by AmiBroker .

The WordPress documentation provides information on advanced features and administrative details. It is not necessary to be familiar with the details to be able to contribute. (Some of the features mentioned in the WordPress documentation were not required for the UKB site and have not been incorporated into the customized version used by AmiBroker). WordPress, in it’s standard version, assigns roles and capabilities to users as a fundamental part of it’s operating model. There are five roles; Administrator, Editor, Author, Contributor and Subscriber. For ease of use, and to facilitate a self-managed site, AmiBroker has chosen to enroll the majority of contributors as Authors. Capabilities, which are task orientated, are assigned to the Roles incrementally, at the Administrators discretion. AmiBroker has elected to provide Authors with the authority to upload files and edit, as well as publish, their own posts.

For additional information on Roles and Capabilities refer to the WordPress documentation:

http://codex.wordpress.org/Roles_and_Capabilities

WordPress Publishing Procedures

Login

To be able to write and publish in WordPress approved Authors need to login to the WordPress Administrative Center via the UKB homepage.

To login to the WordPress Administrative Center:

  1. obtain a Username and Password from support [at] amibroker.com
  2. click on Login, in the right hand sidebar of the UKB homepage, and enter your Username and Password into the Login Window,
  3. then click the Login button.

To remain logged-in for long periods Remember me can be checked. Once logged-in, with Remember Me checked, the links in the Meta section of the UKB sidebar will change to Site Admin and Logout. Clicking on Site Admin will take logged-in users straight to the starting panel. Alternatively, a shortcut placed on the desktop will also provide direct access to WordPress for those who remain logged-in. (Note that the sustained login stores the logged user in a ‘cookie’ on the local computer. It may not work for those who have disabled their ‘cookies’).

Login Window

WordPress Administration

A successful Login will open the WordPress Administration Center with the Dashboard as the default view.

For Authors there are four other panels, besides the Dashboard, available: Write, Manage, Comments and Profile .

WP002

For an overview of The Administration Panels refer to the WordPress documentation:

http://codex.wordpress.org/Administration_Panels

WordPress Administration Initial Setup

On the first visit to the Administration Center there are some preliminary tasks to perform.

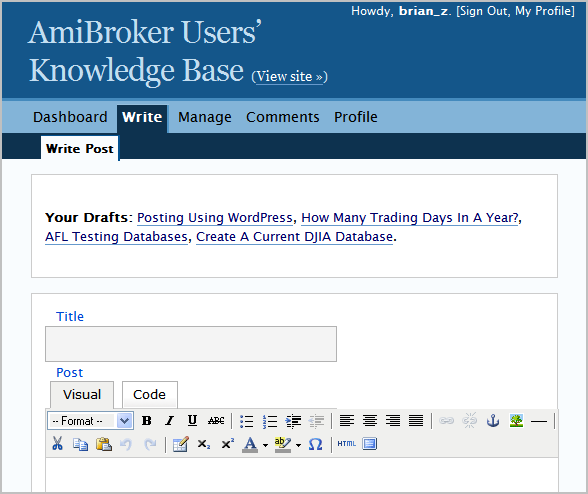
To start, click on Write . This will open the Write Post Sub-panel with the Visual Editor as the default view.

WP003

The Visual Editor is an add-on feature to the basic WordPress software. Unfortunately it has many faults and it is recommended that it is not used. It also causes conflict with ‘code’ tags, a custom feature provided by AmiBroker for displaying AFL formulas, and other third party WYSIWYG editors. The Visual Editor should be turned off.

To turn off the Visual Editor:

  1. go to the Profile panel,
  2. uncheck Use the visual editor when writing ,
  3. and click on the Update Profile button.

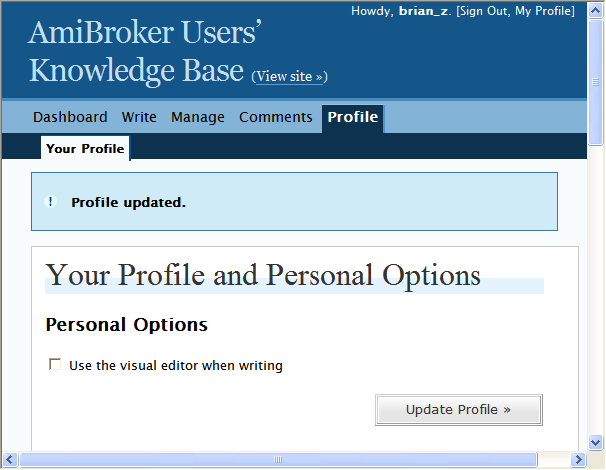
A confirmation message box will appear to acknowledge that the Profile has been updated.

WP004

The password provided by AmiBroker can also be customized in the Profile Panel , and personal information can be entered and updated at the same time.

The Write Panel

After updating Personal Options return to the Write panel and the default view will now be the Code Editor. Those familiar with HTML can write posts directly into the Editing Window .

Start by entering the Title . It can contain any words or phrases. Commas, apostrophes, quotes, hyphens, dashes, and other typical symbols can be used. WordPress will retain symbols in post titles but remove them from links used within the program. Avoid using the same Title twice as that can cause problems.

Above the Editing Window is a collection of buttons, or Quicktags, that produce snippets of HTML for applying formats; bold, italic, image, links, lists etc. How to use Quicktags will be demonstrated in a separate article Introduction To The Code Editor .

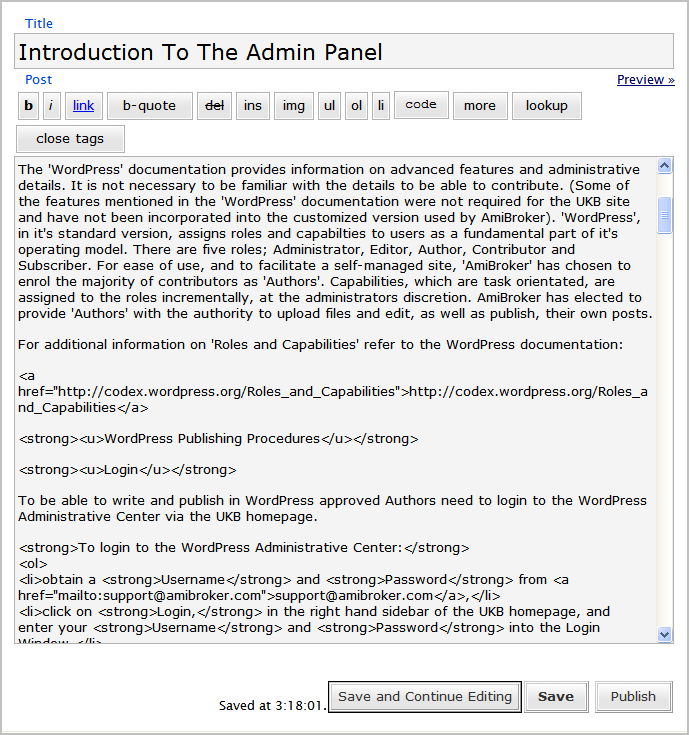
WP032

As an example of HTML publishing, a segment of the code that underlies this post has been included in the screen-shot above.

(The image was captured at one of the draft stages of writing and may differ from the published version).

For those unfamiliar with HTML a basic example will be provided in a separate UKB post, Introduction To The Code Editor. Users who prefer GUI methods need not be concerned as help with using a visual editor will be available in a separate UKB series, Using Visual Editors .

As well as providing an interface for post content, the Write Panel also has a range of input boxes that provide users with publishing options.

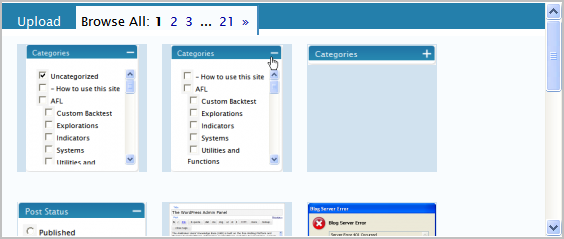
WP009

They can be expanded by clicking on the cross in the top right of each box.

WP010

Before saving for the first time check that the posting options have been initialized to their defaults:

  • Categories – {empty}
  • Discussion – Allow Comments, Allow Pings
  • Post Password – {empty}
  • Post Slug – {empty}
  • Post Status – Draft
  • Post Time Stamp – current date/time
  • Page Order – zero
  • Trackbacks – {empty}
  • Custom Fields – {empty}
  • Optional Excerpt – {empty}

As writing progresses, the post can be saved as a draft.

WP008

To save a post as a draft:

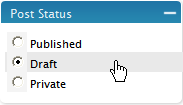
  1. select the Draft radio button in the expandable menu box to the right of the Editing Window,
  2. click on the Save and Continue Editing command button,
  3. or click on the Save command button if ending the session.

The post will be saved as a draft and a Preview>> link will appear in the top right hand corner of the Editing Window. Clicking on this link will open the post in web view to allow the Author to check the post as it will look when published. After saving for the first time, the page will be moved from the Write panel to the Manage panel and a Delete this draft button will be added to the bottom left of the page. Drafts will not be visible to the public, but other contributors to the UKB site might be able to read them. They will appear in the Your Drafts list at the top of the Write and Manage panels. Clicking on a title in either of those lists will load it for further editing. (Posts do not appear on the Mass Editing list, until after they have been published).

WP027

After saving a draft for the first time it will be listed as Uncategorized and Uncategorized will automatically be moved to the top of the Categories list. It will remain there until the post is assigned another home. (The category that a post is assigned to appears at the top of the Categories menu box by default).

WP011

The Upload Sub-panel

Images can be inserted into, or linked to, posts in various ways. (For simplicity, this example will refer to images only but the instructions are also applicable to other types of files). This is managed from the Upload Sub-panel, which is located in the area below the Editing Window. Initially there are two [tabbed] sub-panels in view; ‘Upload‘ and ‘Browse All’. Essentially ‘Browse All’ is like a file library, to which images or files can be uploaded. Images are listed in the browse page as thumbnails and files are listed as thumbnail size icons that contain the file name in text.

(Note that images uploaded using some third party Visual Editors may not appear as thumbnails. Some software will produce images that use file icons).

To browse the file library:

  1. click on the Browse All [tab],
  2. select the required page number (use the page >> arrows to move through the complete range),
  3. use the scroll arrows at right to view all the thumbnails on each page.

WP012

The files in the library are common property; they are a collection of all of the images and files uploaded to the site by all users, since the site inception. An Author can use any file, but they can only delete their own files or images. Only the Administrator or the Editor can delete common files.

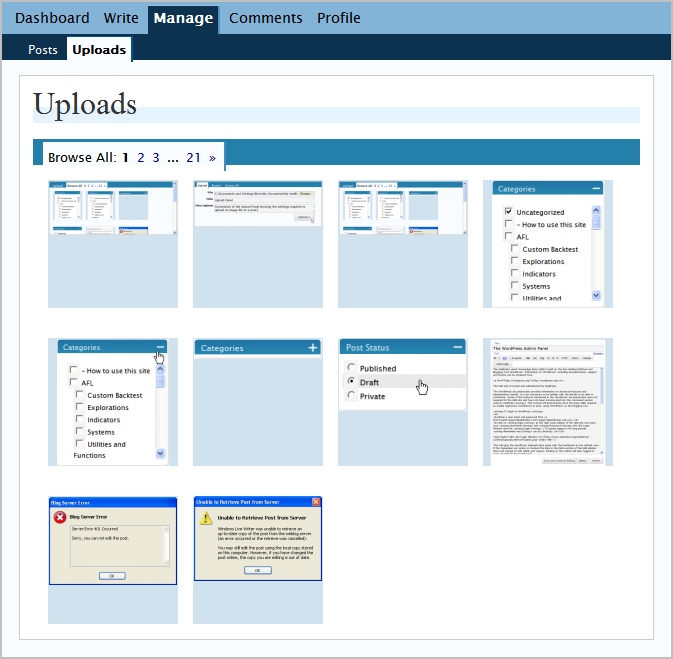
The complete catalog of files can also be viewed by selecting the Uploads [tab] at the Manage Panel .

WP015

Authors can upload files for their own, or common use. Once a file has been uploaded another [tabbed] Browse Sub-panel will appear. It will only contain the files and images that belong to the particular post that is current at the time. Files in the Browse Sub-panel have the same appearance and behavior as files in the common library and they have joint membership of both groups.

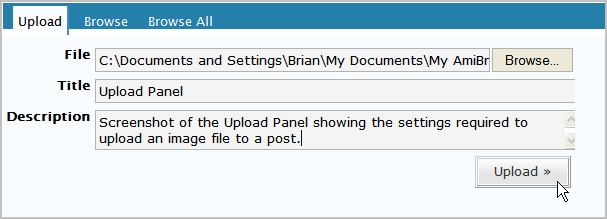
When uploading files the Author has the option to enter a Title and a Description. If an image is inserted into a post, the Title will appear as text when the mouse is hovered over the image (this may not hold true for all browsers). It will also be the text displayed if a Title is inserted as a link. The Description is only used if an image is linked to a page (it will be included as page content).

To upload files:

  1. click on the Upload [tab] to open the sub-panel,
  2. use the Browse button to find and select the required file from the local computer (the standard MS browse window will open),
  3. enter a Title (if a title is not entered the default will be the name the file has on the local computer),
  4. enter a Description (if a description is not entered the default will be {empty}),
  5. click on Upload.

WP013

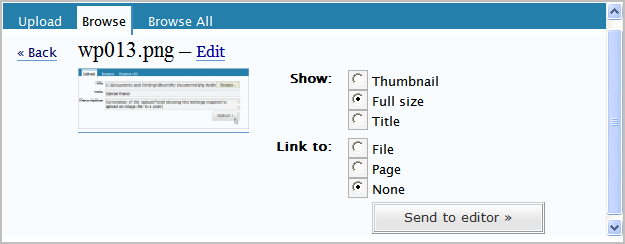
After uploading the file can be inserted into a post at any time e.g. images can be shown in a post as a thumbnail, or as originally sized, with the option to link to a file or a page.

To insert an image :

  1. left click on an image in the post library (Browse), or common library (Browse All ) to view the Insert menu;
  2. select the Thumbnail or Full size option,
  3. select Link to None ,
  4. hit the Send to editor >> button.

WP017

The defaults for the Insert menus are Thumbnail and File . There are several possible ways to insert images, however the author of this document finds some of them have no practical use e.g. inserting an image as a page link is not recommended as the image produced has very poor quality. Users can experiment with the different combinations to find what works for them, or suits the style of post they want to make. All of the images in this post were inserted full size with no links. This is the recommended method as it allows readers to print the posts with the full size images included.

(Note that if page linking is not going to be used there is no need to file the Description , as it is only used in linked pages).

It is also possible is to insert images that open from text or thumbnail links. Some authors may prefer this as it provides a more compact post.

To insert a linked image:

  1. select the Thumbnail or Title radio button,
  2. select Link to File ,
  3. hit the Send to editor >> button.

This will insert a Thumbnail, or the Title , into the post as a link. When they are clicked on by readers the full size image, as uploaded, will open in a separate window.

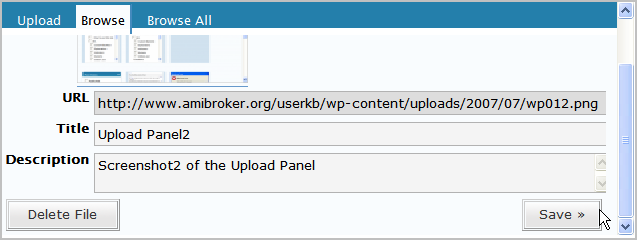
The Title or the Description of the file can be changed at any time.

To change the Title or the Description:

  1. click on the image,
  2. click on the Edit link that is appended to the file name in the Browse – Insert sub-panel (edit and insert are alternate views in the Browse sub-panel and they can be toggled back and forth via the Edit/Insert links),
  3. over-type new text into the input boxes,
  4. click on the Save>> button at the bottom of the Edit sub-panel.

WP018

Note that this only changes the Title and Description for any subsequent inserts. It does not change them for images that are already inserted in a post. The Edit settings are pre-conditions and they are not dynamically linked to inserted files. The image properties; Title, Description, Show and Link are captured in code on the initial insert. After files have been inserted their properties can only be modified by changing the code. The exception to this rule is linked pages, which are dynamically generated each time they are opened. Images or attachments can only be deleted from a post by deleting their code. There is no warning given when removing images from posts in this way.

For additional information on Using Image and File Attachments refer to the WordPress documentation:

http://codex.wordpress.org/Using_Image_and_File_Attachments

Publishing

When writing is complete and the Author is satisfied with the final version it can be published.

To publish a draft:

  1. open it from the Your Drafts link at the top of the Manage panel,
  2. click in the Uncategorized checkbox to deselect it,
  3. select the Category of choice,
  4. click on the Publish button below the editing window.

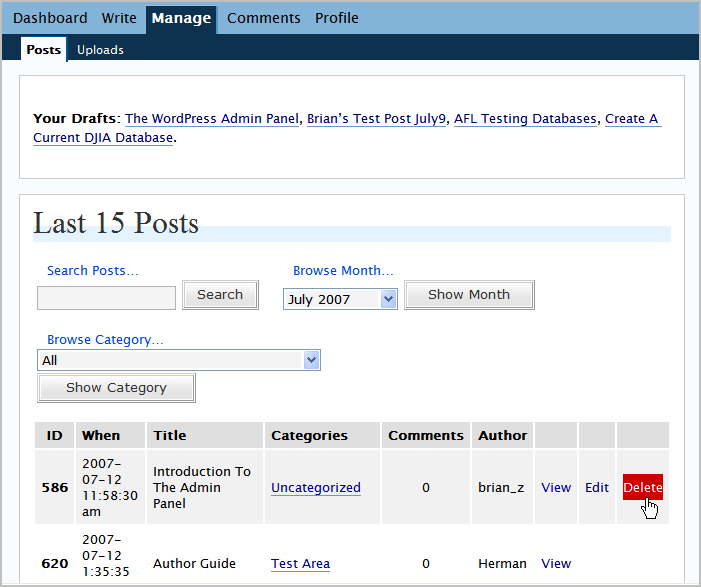
The post will be published and it will be moved from the Your Drafts list to the Mass Editing list on the Manage Panel . It will appear at the top of the list (the list is ordered by published date). All published posts are listed and they can be viewed from the list. Author owned posts can be edited or deleted by clicking on the appropriate link.

WP021

Published posts can be returned to Draft status by changing the Post Status setting and Saving the post. It is not recommended to do this as RSS feed readers may receive additional copies when the post is republished.

Please try to avoid publishing until the final draft version has been carefully checked, as visitors to the site may have RSS feeds enabled. Any published version of a post will appear in user’s RSS lists, even if the post is deleted at a later date. Once a post is published there is no guaranteed way to take it back.

Editing Published Posts

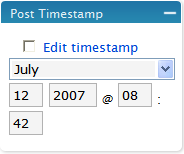
When a published post is opened for editing it opens in the same template as the draft, except that the Delete this draft button changes to Delete this post and the Timestamp, which tracked current time in the Draft , will be set to the published date-time. This can be confirmed from the Post Timestamp box. In the Draft this reports current time only.

WP022

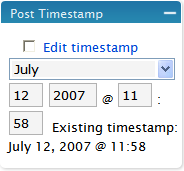
In a published post the Timestamp is frozen and text confirmation of the published time is included.

WP023

(Note that the post is sorted by the Timestamp in various places, including; the Mass Edit list, Searches, Archives and Categories or Subcategories when selected from the sidebar drop-down).

All the other editing features for published posts are identical to those used when drafting.

(Note that changes to the Upload Panel and main editing panel are not automatically saved. The Upload Sub-panel edits need to be saved using the local button and changes to drafts or published posts should be saved at the Editing Window buttons before closing the page or publishing the post).

Deleting Published Posts

When a post is deleted any files that were in the local library will remain on the server in the common library. It is recommended to delete library files from the server before deleting a post, unless the author has a future use for them.

Uploaded files can be deleted from the Edit Sub-panel , but only by the owner.

To delete uploaded images:

  1. go to the Upload Sub-panel,
  2. click on the image,
  3. click on the Edit link that is appended to the file name in the Insert sub-panel,
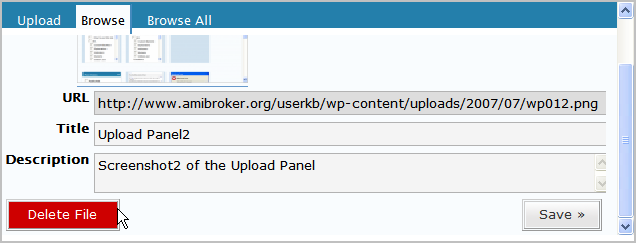
  4. click on the Delete File button at the bottom of the Upload sub-panel.

WP019

When the mouse pointer is hovered over the button it turns red to warn the user of the consequences of clicking on the button and a confirmation message box will open with a warning.

WP031

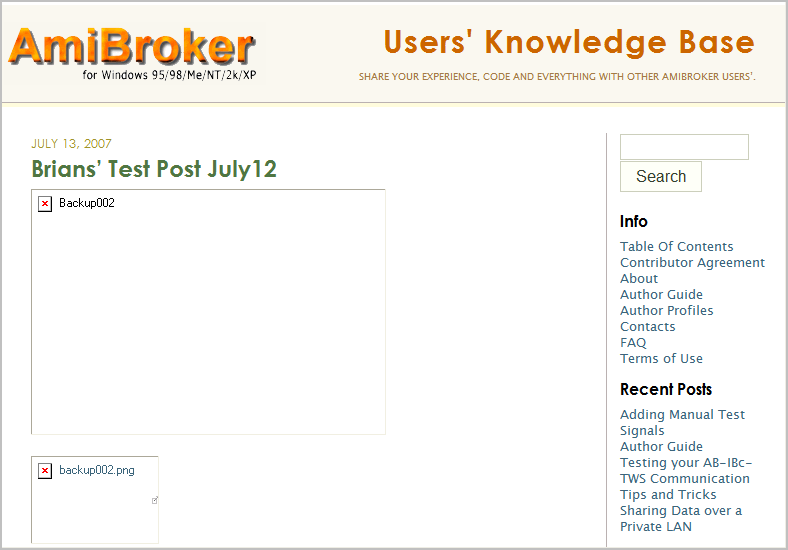
Notice the distinction between deleting files from a post and deleting files from the library. When a file is deleted from a post it is still in the library. When a file is deleted from the library it is deleted permanently. Where a post references a file that has been deleted from the library, the image will remain within the post as an empty shell, with the Title displayed as the alternate heading.

WP030

Comments Sub-panel

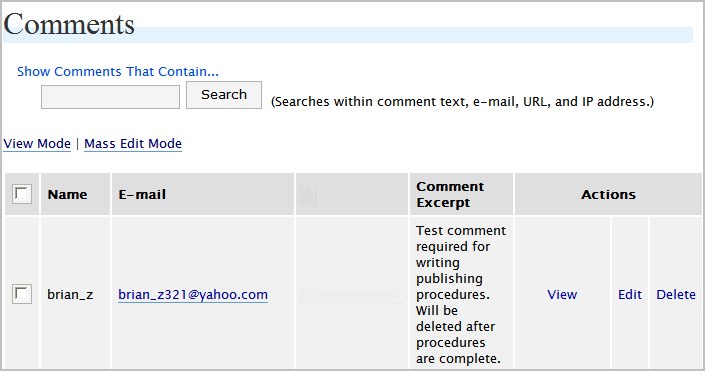
The final area available to Authors is the Comments Panel. Here Authors can modify or delete comments that are attached to their own posts.

WP024

The Awaiting Moderation Sub-panel is also accessible from this screen but it doesn’t contain any content for Authors . Moderating and approving comments, and checking them for spam is looked after by the Administrator or Editor .

That completes this section on Using WordPress . For a better understanding please read it in conjunction with other posts in this series.

For additional information on Writing Posts refer to the WordPress documentation:

http://codex.wordpress.org/Writing_Posts


See you at the UKB Authors Forum ……………happy publishing!

add – post ID

add – upload library (second panel)

Next Page »